In this tutorial i will show you how to create abstract design element. The most important thing that you learn is not how to make this element, but how to apply symbol (map art) on the 3d object and how to use blend function.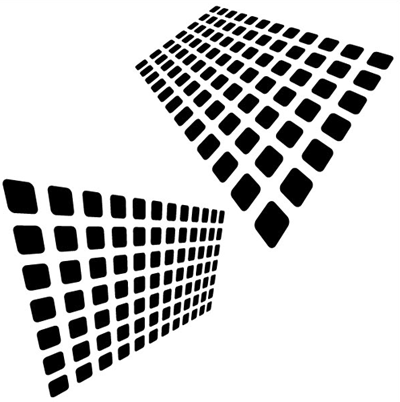
1. Create new document
Size is not very important, but i suggest to keep it not less than 600 x 600 pixels.
2. Create rounded rectangle
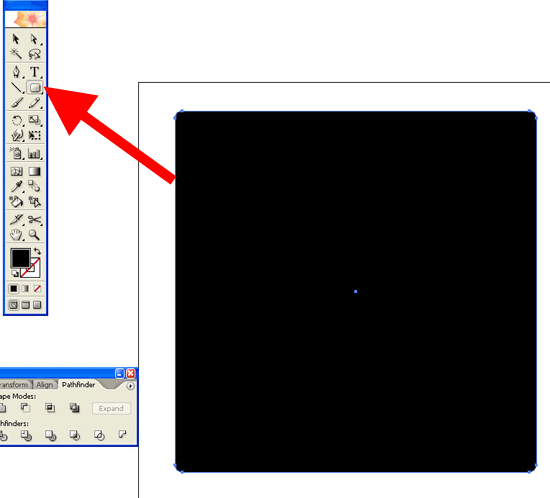
Now create rounded rectangle using rounded rectangle tool, if you dont see it, left click and hold until you see popup with new menu. Simple click that tool and then click anywhere on the document. When options appear, choose width and height of 50 px and corner radius of 10 px. Now you have created a small rectangle.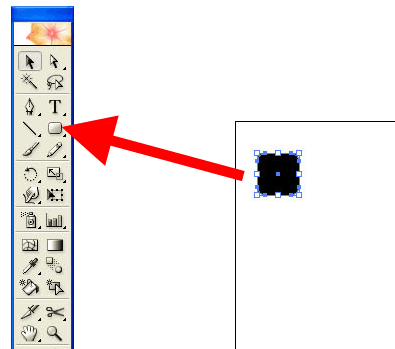
3. Create second rounded rectangle
To create second rectangle select the first one when press and hold alt key,while holding alt key press right arrow key on the keyboard. You need to press it only once! Now release alt key and then press and hold right arrow key till you place the second rectangle in for some distace from first one.
4. Go to blend options
On the illustrators menu bar select object/blend/blend options. From the spacing popup menu select Specified Steps. This function will insert number of object copies in between those two that you draw.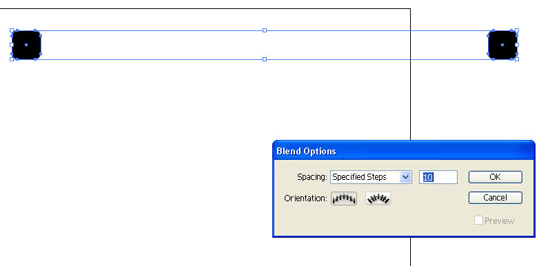
5. Make blend
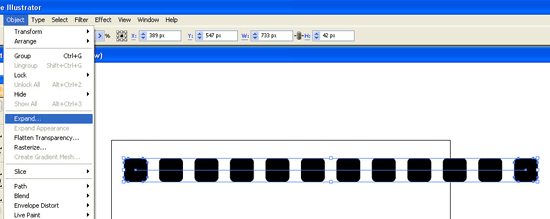
Now go to the Object/Blend/ and hit Make. Make sure that you have selected both rectangles before blending.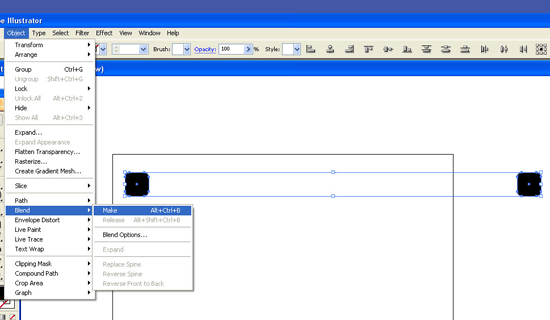 Bellow you can see that i have blended in 10 rectangles between first two. It doesnt matter how much you will choose, make sure you see some gaps between rectangles. Now you can simply choose diferrent number of object if you want. With all rectangles selected, go again to Object/blend/blend options. Play with it.
6. Simplify object
With all rectangles still selected, go to Object/ Expand and hit ok. After you expand it you no longer be able to choose steps to blend in. You now have expanded it to single grouped elements. You have to do it if you want to edit seperate elements.
7. Make a copy of first set of rectangles
Select all rectangles and make a copy of it like in the previous step but now not to the right direction, but to the bottom. While holding alt key press down arrow once to make one copy. When release alt key and move the copy to the bottom. Make some space in between to insert more elements.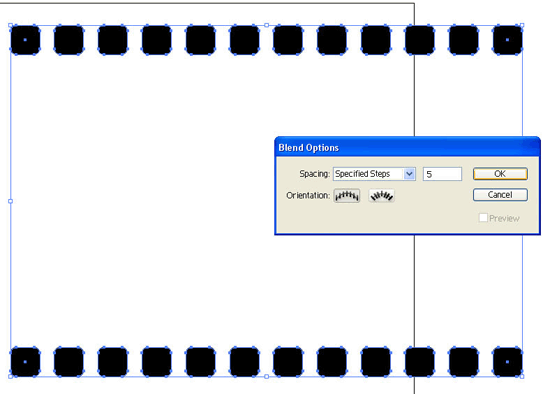
8. Blend it
Select both groups of rectangles. Now in the blend options menu i selected 5 steps. Go to Object/Blend/Make. Again expand it to single elements. After you expand it, you wont be able to choose diferent number of steps again. While you see that blue line, you can choose diferent number of steps.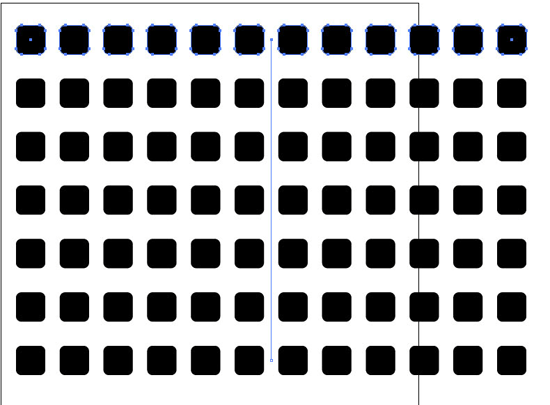
9. Convert element to symbol
Now that you have created the element that you like (more or less), you can convert it to symbol by dragging it to Symbols menu. Symbols menu by default should be in the right. If you dont see it, go to Window in the menu bar and select Symbols. Now you should see it. Delete all elements what you have created. You now have it in your symbols menu and you no longer need it on the document!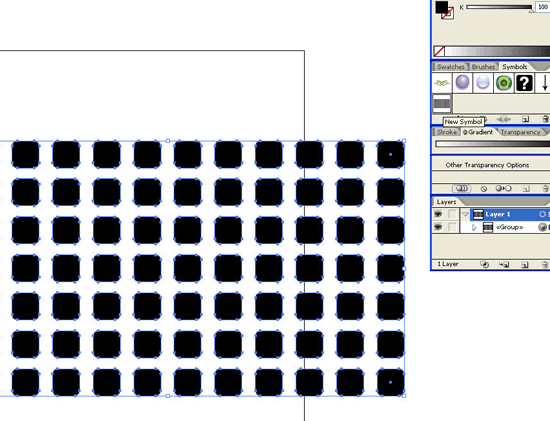
You have ended first part of the tutorial!
Now you should take a break before moving on to the next part, because reading from computer monitor is not good for your health. Take a coffe break 🙂

10. Moving on
Now that you have previuosly created element in your symbols menu, create another rectangle with width and height of arround 500 px and corner radius of 10 px. You can simply create it by clicking on the rounded rectangle icon and draw it with mouse or with single mouse click and then choose options.
11. Convert rectangle to 3d object
Select object and go to Effect/ 3D/ Extrude & Bevel.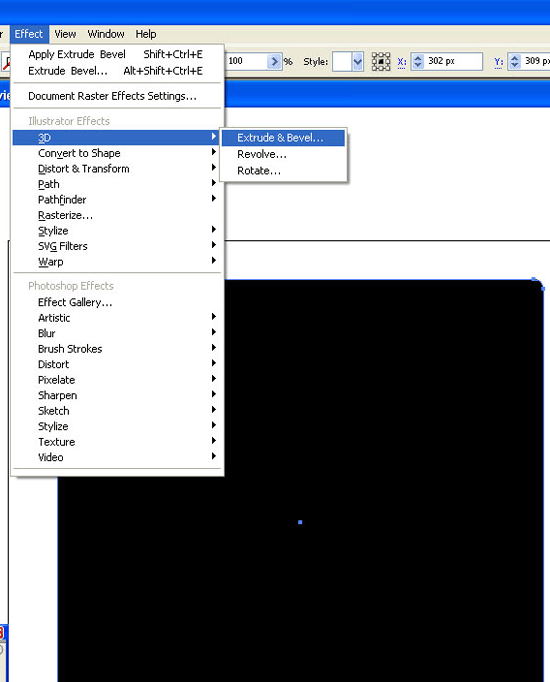
12. Apply the map art on rectangle
When 3D Options menu appear, click Map Art button.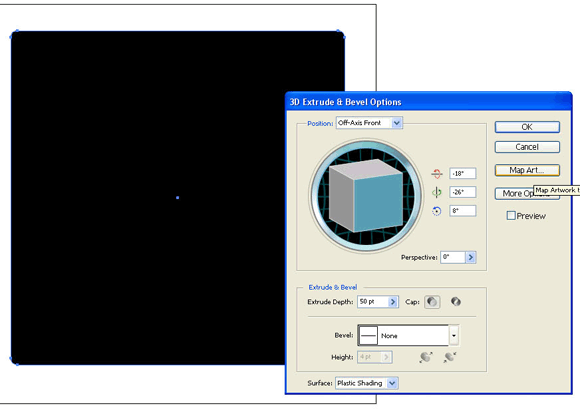 Now select our previously created object from Symbol popup menu.
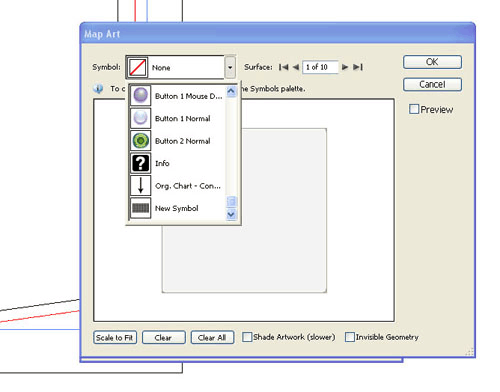 Select Invisible Geometry and click Scale to Fit. Click OK.
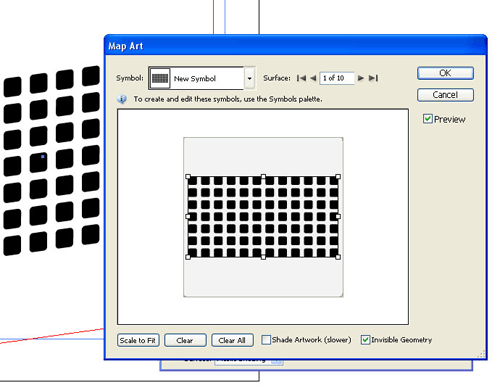
13. Choose 3D Options
You will see only the symbol that you have created in the first part of the tutorial. The big rectangle now is invisible and the symbol is now conected to that big rectangle. Now back in the 3D options. Choose perspective number, for example 100-130 and click OK.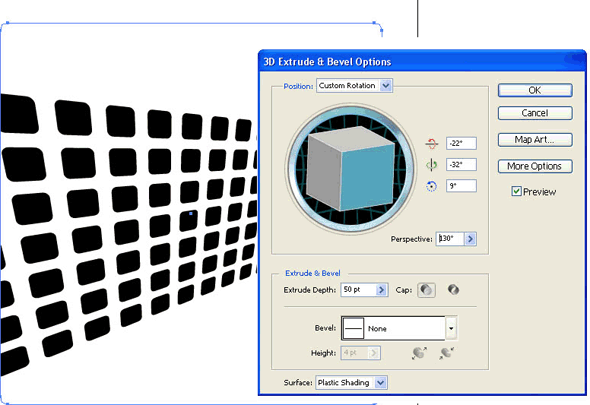
14. Clean up the mess
You have succesfully applied symbol on 3D rectangle. Now press right mouse button and select Ungroup. Keep doing that until you see Rellease Cliping Mask, then hit it. Then again ungroup all element. By doing that you will remove all trash that 3D function has created (invisible big rectangle).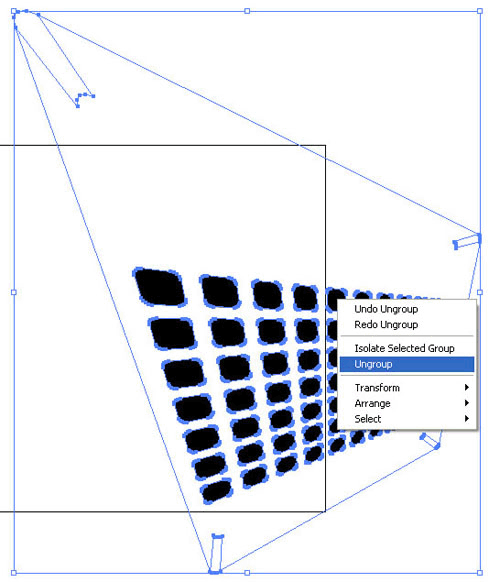
15. Thats it!
To duplicate object, press and hold alt, then drag element with mouse to your desired location then release alt and then release mouse button.

