
You might be thinking that graphic design is hard and complicated for a beginner to even attempt. But the contrary is true. In fact, designing seamless patterns has never been easier. With access to quality vector stock, you can speed up your creative process and make professional-looking patterns in no time.
This article will teach you how to use Adobe Illustrator to create seamless repeating patterns. Or if you prefer to do it in an easier and faster way just go to the Pattern Generator and make it online!
Tips Before Starting
Before we get into the process itself, it would be good to note some tips that will help you along the way:
- If you are planning to be designing the patterns on a regular basis, it would be a good idea to make a list of themes or topics you want to explore. Then, you could plan when and what you will be designing.
- In case you want to design patterns for your online store, you can include patterns with text. This can be done both in English and in other languages. If you are only fluent in English, you can always order a translation from an online translation service such as The Word Point. Reaching out to foreign audiences is always beneficial for you.
- To continue on the online store topic, some good online store platforms for artists and illustrators include RedBubble, Society6, and TeePublic. These only require you to upload an image and work on the production and delivery processes themselves.
- If you are planning to print your patterns, it would be better to select CMYK color mode before starting to work on your file.
- There are many free pattern templates online which you can get inspired. However, most of them probably cannot be taken for commercial use. You can also use Pinterest to find inspiration.
1. Create Your Objects
Before you can even start making a pattern, you need to create the objects that will make up your pattern. This can be only one item or several. The ideal number would probably be three because this creates diversity and is pleasing to the eye.
To create objects (for example, three different types of leaves), open Adobe Illustrator, create a new file, and draw the simple designs. You can make them more intricate if you have the skill, but even the edgier, more simplistic ones will look great in a pattern.
If you are new to making patterns, you may want to start with some basic geometric objects. Create a circle, a square, and a triangle in different colors. After practicing, you will switch to the more complex designs.
2. Make Your Pattern
Now, we will turn your objects into a pattern. Simply select them and then go to Object-Pattern-Make. Once you do that, a pattern window will appear and you will be able to adjust some of the details of your pattern.
After transforming your objects into a pattern, it will not look too good just yet. It is important to keep in mind that you will have to change some of the aspects of your pattern to make it look better.
Try to avoid having overly detailed objects. If you zoom out of the pattern, they may look not very nice, so always test your objects before creating a pattern out of them.
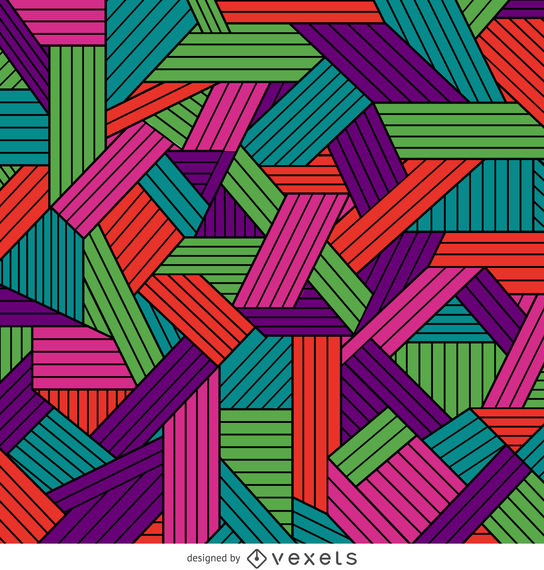
Pay attention to the color palettes. Don’t combine colors that look disgusting with each other. There are certain color combinations more pleasing to the eye and you may also want to use colors from the same groups, such as cold or warm colors. However, the opposites look well too if combined the right way. You can search for pre-made palettes online or on Pinterest to get a safe combination right away and base your objects on it.

3. Make Adjustments
Once your pattern is created, you still have to make some adjustments and fix things that don’t look good enough:
- Add And Delete Elements: The first thing you can do is add or delete certain elements from your pattern. You may have noticed that it looks too crowded, so you can remove some items to make it look evener.
- Change Color: If you want to have the same pattern in different colors, you can play with the hue and other features to see what kind of variations you like. This is especially helpful if you need several versions of one design.
- Change Size: Some patterns look better when the objects on them are bigger, while others require smaller elements to look great. Notice how flower designs may include only one type of flower that is small and packed together in a pattern. At the same time, other flower designs show a variety of huge flowers with gorgeous details. Obviously, if your objects have more details, it might be better to make them bigger.
- Change Position: The position of your items in a pattern can also be changed. Just see what you would like to reposition and make the necessary changes. This is especially useful if you don’t want to delete objects on your pattern, but instead, want to reposition them in a more even way.
- Make Copies Transparent: There is also an option to make the copies of your objects transparent. You can do this by using the “Dim Copies” option.
4. Final Steps
Now your pattern is ready. You can access, edit, or apply it any time through the “Swatches” panel located on the right side of the Adobe Illustrator window.
You can also test your pattern. To do this, add a simple shape to your new file. Then, click on the swatch you just created. The pattern should apply to your object. If everything works, congratulations!
Now that you know how to create seamless patterns, you can experiment with Illustrator some more. Using different brushes can add value and variety to your patters too, so don’t hesitate to try those. It’s all about finding what works for you best.
Conclusion
All in all, designing beautiful patterns in Adobe Illustrator is really not as hard as it seems. You simply need to follow these steps and practice. After some hard work and dedication, you will become an expert on designing seamless patterns.