In this tutorial I will show you how to create vector Disco Ball in CorelDraw. The most important thing that you will learn is how to simplify your drawing using effects like Blend, Lens and Drop shadow.

1. Making texture of Disco Ball
Open new document and save it for example “Discoball.cdr”. Now create a square with a rectangle tool (F6). Press hold down CTRL key, press left mouse button and drag – it makes a square. Now open Size transformation panel ( Arrange -> Transformations -> Size) or
(ALT + F10). Change Width and Length to 1 unit for precision.

Next we will make a clone of square, move it and blend that 2 squares. So make a clone
( Edit-> Clone) or (+).Open Position transformation panel (Arrange -> Transformations -> Position) or (ALT + F7) and move the clone square about 42 units. Now select 2 squares and make a Blend effect (Effects -> Blend). press Apply and make 36 number of steps.

Now we will clone the row of squares and move it vertical -42 units and make Blend effect again. But before we should convert a row of squares into a single object that we could make a Blend effect. So first select a row of squares and break apart it (Arrange -> break Blend group apart ) or (CTRL+ k). then weld all squares (Arrange -> shapping -.> weld).Now we have a single object. Next clone (edit -> clone) or (+) a row of squares and move it vertical -42 units
(Arrange -> transformations -> Position) or ( ALT+F7) and then select these two rows of squares and make a Blend effect (Effects -> Blend) with 36 steps again.

2. Filling squares with colors
well, next we have to fill the squares. We will use a manual method so we’ll have the squares with the colors we want. first don’t forget to break apart (CTRL+k) and then weld (Arrange -> shapping -> weld).all the squares into a single object.Then to fill all squares in different colors break apart object again (Arrange -> break apart) or (CTRL + k).And now start filling squares.
First select one or more (hold SHIFT key) squares and then pick color from palette. if the selected color is to bright hold CTRL key and pick black color then you will see it’s getting darker ( CTRL + color).

3. Filling squares with colors
Next we have to make a sphere from texture. to do that we need to use Lens effect. So first draw a circle then select it and use Lens effect ( Effects -> Lens) or (ALT+F3). Then move circle on texture and will see a magnifying effect. next move circle to the center of texture and in Lens properties choose “Fish eye” type of lens and rate make 200% and tick on “frozen” setting that the magnifying would be locked. thats all we can move out the sphere from texture.

4. Making shining effect
The Last thing we have to do is shining effect. First draw a black rectangle (F6) and then draw a white star on it ( press on polygon button (y), hold and in floating menu you will see star tool) choose Star tool and draw. now to make contour of the star invisible pick a first color from top of palette with right mouse button. Then to change the shape of the star choose Shape tool (F10) and then you will see the nodes on star. Grab one of them and drag inside of the star to get a thinner star. Next use a ”Drop shadow tool” from toolbox to get a glow effect. In “Drop shadow tool” settings choose medium glow preset and then you can play with the parameters to get a result you want. Now we have a glowing star.

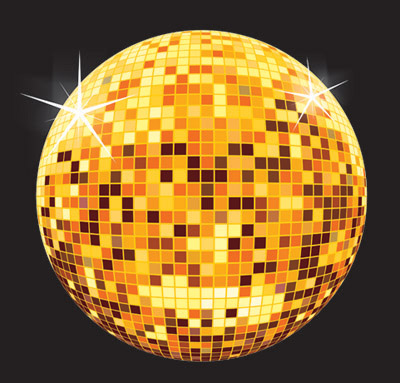
To finish this lesson we have to put the sphere on the black rectangle and the stars on the sphere.That’s all. This is a final result.