In this tutorial I will show you how to make an abstract background in Illustrator CS5. The most important things that you will learn are the Blend tool, glow and blur effects, working with strokes and clipping mask.?

1. Making a background
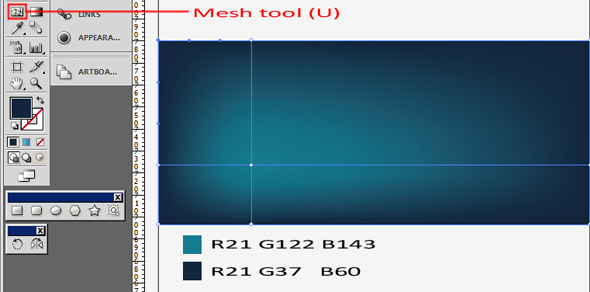
First open a new document (CTRL+N) (page size 257mm x 109mm) and save it for example “background.ai”. Now create a rectangle, press M and just click on screen and drag. fill rectangle with dark blue color . Now create a gradient effect with mesh tool (U). Click somewhere on rectangle and you should see a new point. Pick lighter blue color for this point and the first step is done.
2. Making first element
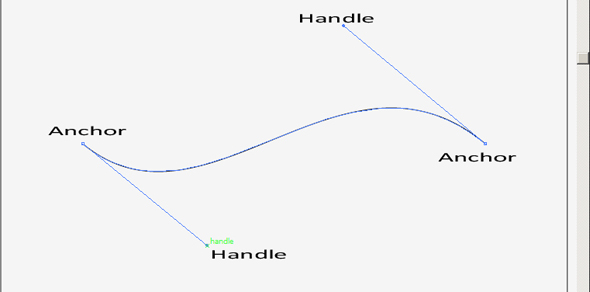
Now we start to draw the first graphic element. So choose Pen tool (P) and draw. Click on screen left-mouse Button (don’t release) and drag. First you’ll see just a handle of point, release button and click on other place to make a second point and now we will see a curve that connect these two points. With Direct selection tool (A) you can make some corrections to get something like in a picture.
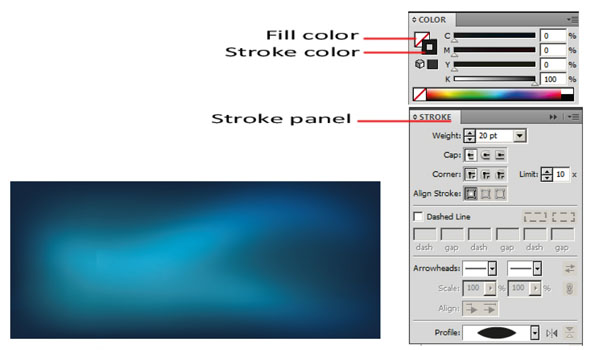
Now go to stroke panel ( Window -> Stroke or CTRL + F10 ) and change stroke weight and profile like in a picture. Then make a blur effect ( Effect -> Blur -> Gaussian Blur). Radius set 23.5. then make the stroke color (not fill color) of it white and put it on the background. Then in transparency panel choose “overlay” to look better and can make a copy like I did by pressing and holding ALT button and draging object with selection tool (V). Result should be similar to the example bellow.
3. Making second element
Now we start to draw the second graphic element. It’s almost the same process. So choose Pen tool (P) and draw. Click on screen left-mouse Button (don’t release) and drag. First you’ll see just a handle of point, release button and click on other place to make a second point and now we will see a curve that we made. with Direct selection tool (A) you can make some corrections to get something like in a picture.

Now go to stroke panel (Window -> Stroke or CTRL + F10 ) and change stroke weight to 6pt and profile like in a first element. Now convert outline to stroke (Object -> Path -> Outline stroke). Then make a outer glow effect twice ( Effect -> stylize -> outer glow). First: opacity – 100% and blur set 1pt. second: opacity – 100% and blur set to 5,6pt. then make the fill color of it white and stroke color to white or none and put it on the background. Then in transparency panel choose type to normal.
4. Making third element
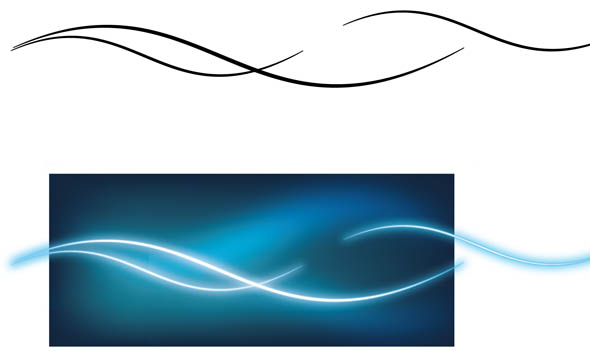
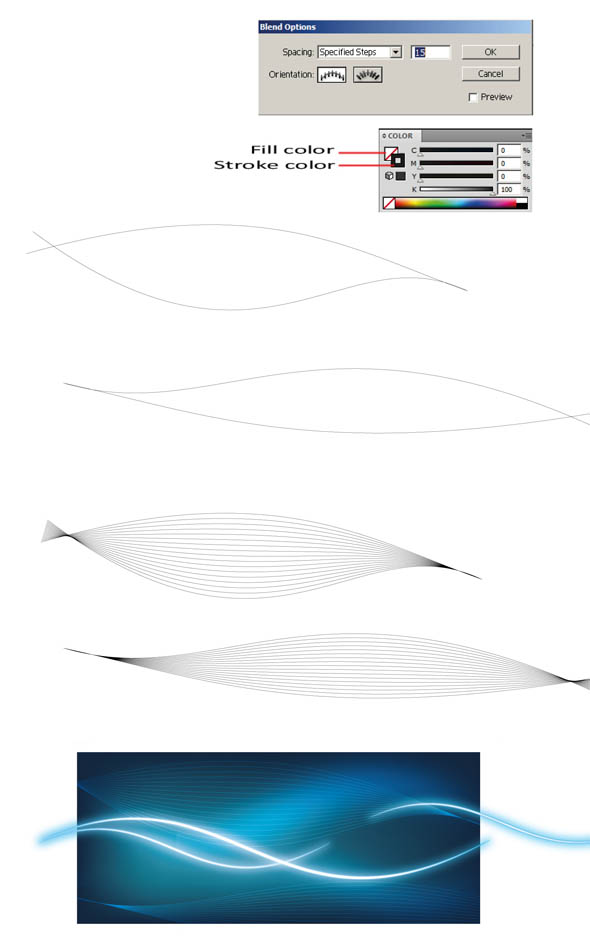
Now we will make the last third element. To make this element we will need to use Blend tool. First make some curves using Pen tool (P) like we did before. Then go to Blend options and set parameters like in a picture. Then select first two curves and make a blend (object -> Blend -> Make or Alt +CTRL + B). Then make the same with two other curves. Change stroke color to light blue and fill color to none and in transparency panel choose overlay. Drag the third element on background.
The last thing we need to do just cut unnecessary parts. first group all elements that we have done select all and group ( CTRL+G). Next create a rectangle directly on background rectangle and the same size. Before drawing check the snapping mode is on( CTRL+ U turning off/on snap). this helps to draw precisely. If snapping is on create a rectangle. Then select group and rectangle and make a clipping mask (Right mouse click, Object -> clipping Mask -> Make or CTRL+7). That’s all. We made an abstract background.
